

How To Use Pinterest To Plan Your Project
Do projects overwhelm you?
Do you wish you had easy access to guides and tutorials for all your crafts & projects?
1. Set up an account!If you’re new to Pinterest, you’ll need to start by setting up your account. Setting up an account is as simple as entering your email and creating a password! You can do that here: https://www.pinterest.com. Pinterest’s website has a lot of great help articles. We’ll walk you through some basic steps, but for more in-depth help, browse the “help” section of their site.
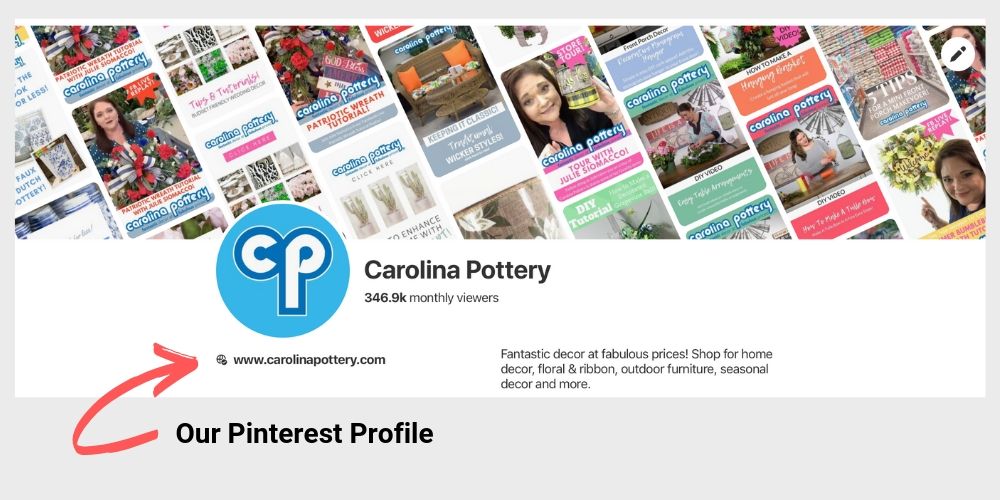
2. Follow us!Did you know we’re on Pinterest? Yep, we love scrolling through the pretty pins too! Search for “Carolina Pottery” in the search bar up top, then click on our profile and click “follow.” If you’re a big crafter, you won’t want to miss this step! We pin all of our DIY tutorials as well as have pins linking to some of our favorite online items! Once you follow us, you’ll be able to see these pins more easily! CLICK HERE TO FIND US!
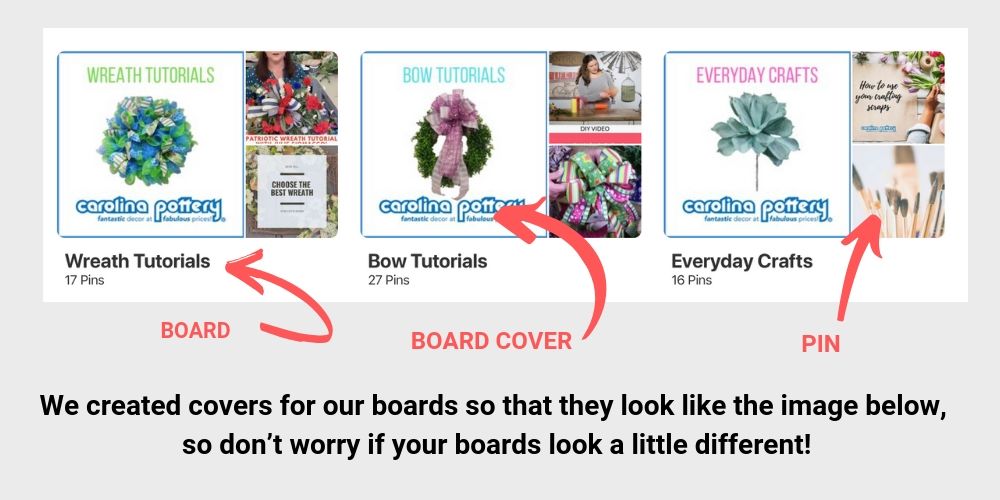
3. Create A Board: It’s time to start planning! Create a board based on the type of projects you want to work on. For example, your board might be labeled “Wreaths” or “Patio Renovation” or “Graduation Party.” Below are some examples of some boards we have to organize our pins. We have boards for wreath tutorials, Christmas tutorials, outdoor living items and decor, mesh & ribbon options…and so much more.
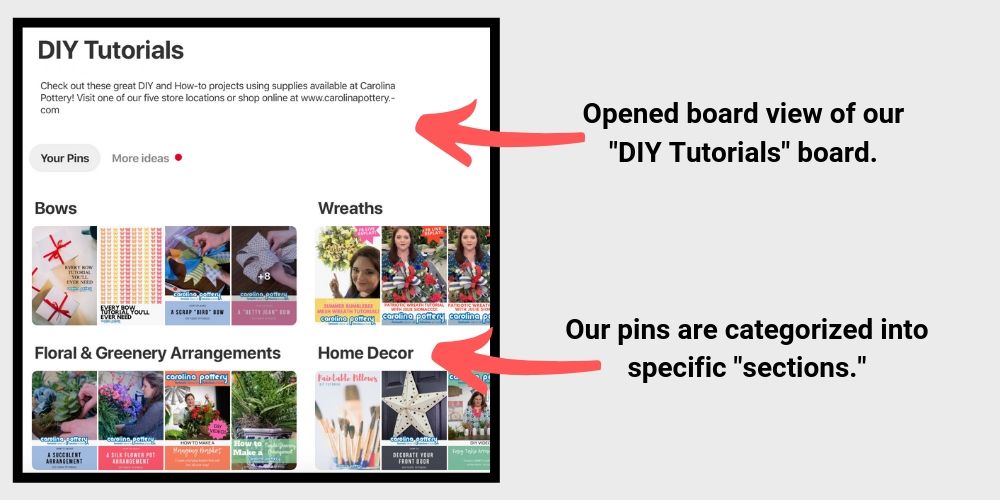
4. Add Sections: Once you have your board created, let’s now create “sections” to organize your board even more. Click on your board and when it opens up, click the “+” sign and click “add section.” Now you’ll be able to add as many “sections” as you’d like to organize your project better. Say you’re working on a patio renovation project. Some examples of sections you could create for the project might be: paint colors, decks, patio furniture, outdoor rugs, pots & plants, and decor.
5. Now it’s time to PIN! Time for the fun part! Start pinning ideas or things that catch your eye onto your board. Let’s stick with our outdoor patio example. If you’re looking for outdoor furniture, go to the search bar inside of Pinterest and type “outdoor furniture.” You’ll see some prompts of similar searches pop up which you can click on if it matches what you’re interested in seeing. You can get more specific with your search to see items more closely aligned with what you want, such as “outdoor summer furniture” or “outdoor wicker swing” etc
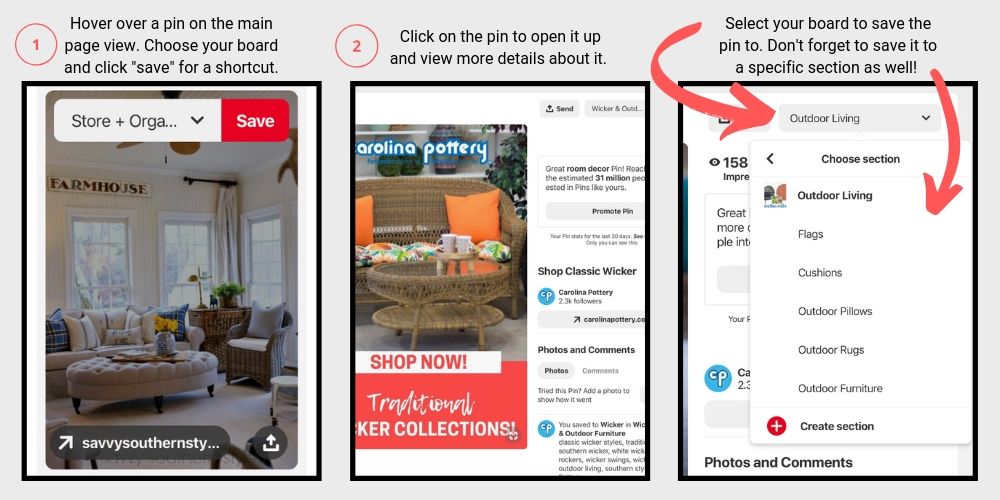
1. Hover over the pin and select the board you want to put the pin on. Then click “save” and keep scrolling! This is the short cut version
2. Click on the pin you like and then choose the board you want to save it on. Click “save.” This is helpful if you’re wanting to first see more detail about the pin you’re saving. You’ll have to click the back arrow to go back to all the pins again.
For both options, you can also save the pin to the specific section of your board that you created earlier.
6. How to know if a pin is worth pinning? Some pins you might be pinning because, well, they're simply just pretty and/or inspirational! Other pins have tutorials or information you might want to keep. So before you pin a pin, how do you know if the tutorial is worth saving?
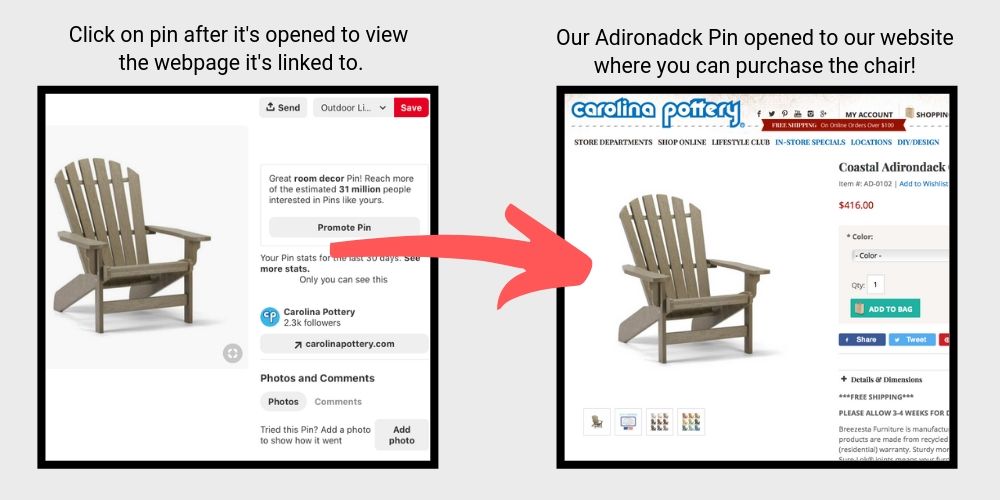
Remember when we opened a pin in step 5? Well we’re going to do that again, but this time, once you’ve opened a pin by clicking on it, click on it again and it will take you straight to the webpage where it’s been linked. This is where you’ll get access to the blog post/tutorial/item etc and can see if it’s worth saving.
So for our patio example, if you’re looking for patio furniture and click on our Adirondack chair pin, it will take you straight to our website where you can purchase the chair! This is helpful to know so while you’re pinning items and planning out your decor for your patio you can know if the actual items you’re pinning are available to buy online. That way you’re not doing to stores to try to find similar items, but getting the EXACT items itself that you loved!
7. Plan Your Project! Now that you know how to effectively use boards and pins, get busy planning all your projects. Start by pinning anything and everything you love! Then go back through each section and refine your choices. Especially when planning a room or a craft, it’s helpful to see all the pieces in one spot so you can get an idea of how they go together and if they’re creating the look you’re striving for.
For the patio example, start pinning all the outdoor chairs that catch your eye. Then look for all the rugs you love. Then do the same for pots, decor pieces, and plants etc. When you’re done, go back through and look at what you’ve chosen.
- What colors did you gravitate towards mostly?
- Do you notice a theme in any of the pieces you’ve chosen?
- Do any of these items no longer “grab” me like they first did?
- Delete any pins that you now just “like” and don’t LOVE.
- Delete any pins that don’t really mesh with the overall vibe.
